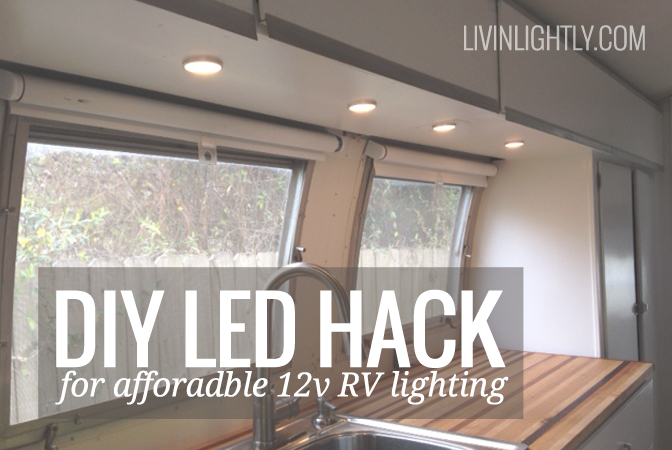
Using LED’s as a light source is a no brainer! LED’s boast 40-50x’s the burn time, 1/10th the power usage and little to no heat emissions. Despite all these benefits LED’s can cost up to 30x’s more per bulb. In the long run LED’s pay for themselves but the initial investment can be substantial depending on the space you need to light.
LED OPTIONS
There are several options when it comes to installing LED’s into your RV: LED fixtures & light bars and bulbs. The Land Yacht had 6 existing light fixtures that use 18 small incandescent bulbs. We wanted to utilize these existing fixtures so we began looking into LED bulbs that are made for these 12v sockets. We quickly found that these 12v LED bulbs are not cheap! At almost $19 per bulb it would cost us over $340 to convert all our lights to LED. (Compare this to .60 per incandescent bulb!)
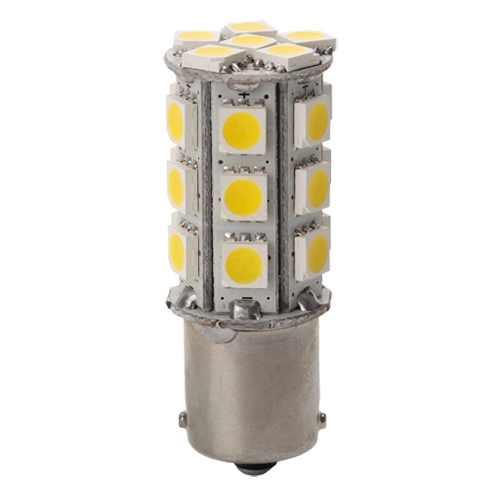
LED Lights for Existing Fixtures $19ea!
So we began looking for different, cheaper, LED options…
CHEAPER LED BULBS
I had heard good things about LED lights from ebay. And at a fraction of the cost I decided to give them a try. While much cheaper (around $5 per bulb) their brightness and color are not ideal and they do not come with any warranty. Once the light diffuser is installed the ebay LED are pretty dim and the color is a cool blue and I much prefer a warmer hue.
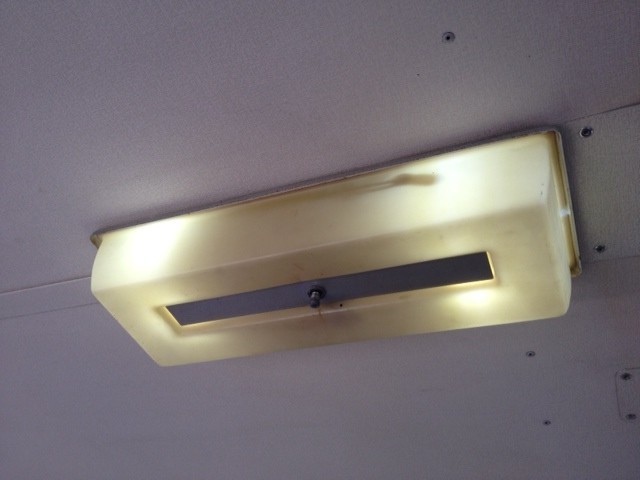
eBay LED bulbs in Existing Fixtures
I’ve seen some very affordable 12v RV bulbs on AMAZON with good reviews. At $11.95 for two its comparable to my ebay buy but look to be a warmer hue and better quality. When looking for 12v bulbs be sure to know what type of socket you need as there is a handful of options out there. The easiest way to get LED’s into your space is simply adding LED bulbs to your existing fixtures.
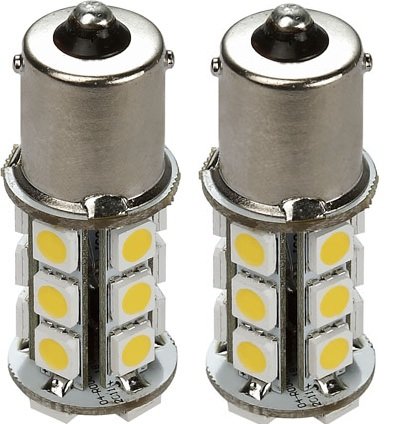
Affordable 12v LED Bulbs $11.95 for 2
IKEA LED’s – DIODER KIT
At a trip to IKEA I found these under the counter LED lights called DIODER. For $29 the kit came with 4 little LED fixtures (9 LED’s per fixtures), mounting hardware, wire and switch. As with most appliances the DIODER had a transformer that converts the AC current to DC. Since travel trailers are made to run on 12v this meant I could hack off the transformer and wire the LED lights directly into the trailers 12v system.
All the trailer lights run on 12v DC power – even while connected to AC shore power. The AC power goes to a power converter that transforms the AC current to DC to run lights, water pump and maintain a charge on your battery. Since we plan to be primarily off-grid without AC power hookups keeping everything on a 12v system makes the most sense.
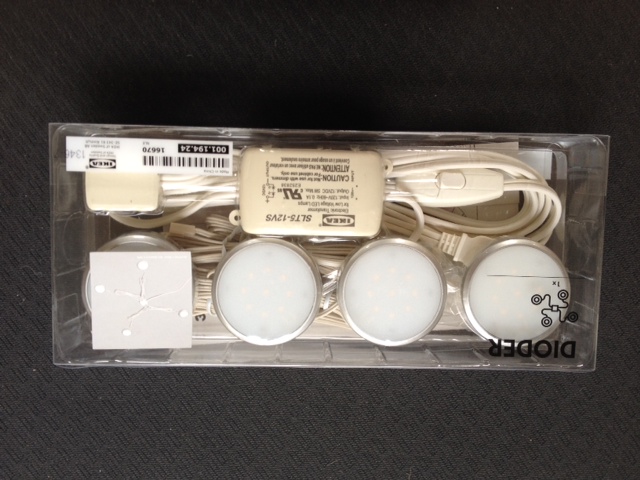
IKEA DIODER Light Kit $29
HACKING THE IKEA LED’s
Installing the LED’s is pretty simple. Select the place you want them installed (we installed them under all our cabinets), cut off the AC transformer then wire them into the trailer 12v power.

Under Cabinet LED Lighting
AC or DC POWER?
Our trailer had 12v power lines run to all the different parts of the trailer we wanted to install the lights. (These 12v power lines were feeding other lights, range vent fan and the heater thermostat.) In our trailer some of the 12v power lines are white wire and others are black. This was a bit confusing because all the AC power lines are white. So I used a power meter to test the lines to verify they were 12v DC. For our trailer black was positive and white was negative.
If you’re not sure whether the wire you are dealing with is AC or DC start with the AC setting on your meter…if the reading is a decimal and jumps around then you’re probably dealing with DC power. You should get a reading of between 12-13.5v DC.
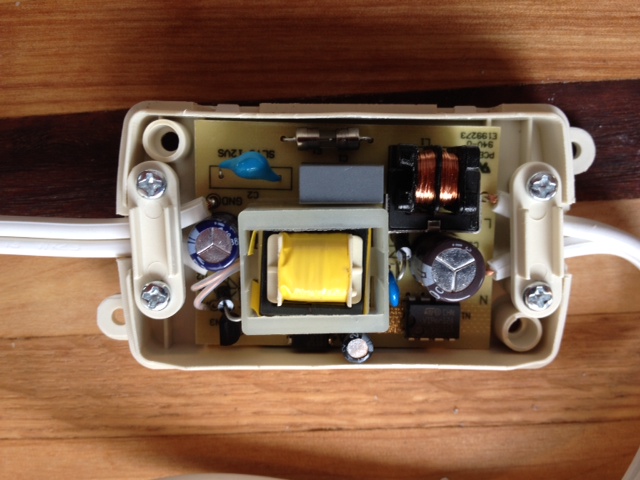
LED – AC to DC Transformer
FINDING THE POSITIVE WIRE
On the actual lights you will need to determine which wire is positive and which is negative. (Note: THIS IS VERY IMPORTANT! DO NOT use trial and error to find the positive and negative…this WILL fry your LED!) The IKEA DIODER wire has writing on the positive wire. If you want to double check this you can take apart the transformer and on the output side of the circuit board it will say 12v+ & GND. Follow 12v+ wire into the junction box then you can see which wire is positive that plugs into the box. On all of my lights positive was the wire with writing on it.

Using the Volt Meter to Find Positive & Negative
MOUNTING
You can either install the lights with an adhesive pad or screws (both included). The LED twist counter clockwise from the silver mounting brackets. To install with screws drill a hole for your wire, screw down the silver mounting bracket then twist in the LED.
WIRING
For a simple, temporary solution, you can use the switch that comes with the light kit. Hack off both ends and strip the wire. Using wire nuts connect the negative and positive to one end of the switch. Use your power meter to verify the +/- wires when you turn the switch on. (These wires should be in-line and the same on the other end of the switch.) Once you have determined the +/- sides connect the corresponding wires from the lights.
Eventually I will install 12v switches permanently recessed underneath each cabinet. I will also solder and heat shrink all the wire joints for a more permanent installation.
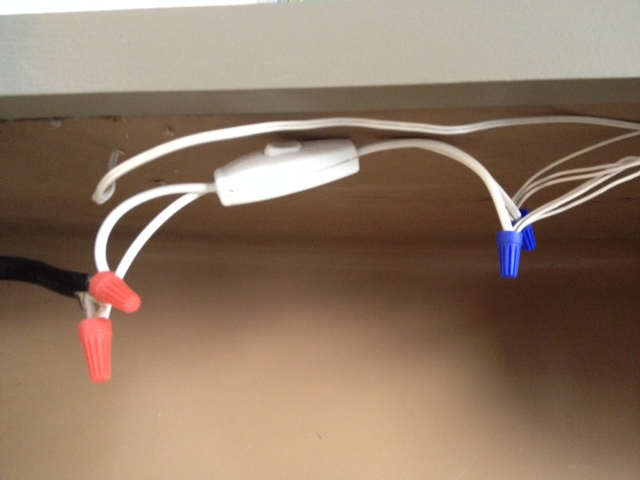
Using Existing Switch for a Temporary Solution
CONCLUSION
The IKEA LED’s give us area specific bright warm light that only uses 5w per 4 fixtures and cost a fraction of other LED options at $7.50 per light. (As opposed to $19 per light) These little fixtures are great accent lighting and a cheap way to get 12v LED into your RV!
Thoughts? Questions? Comment below!
RESOURCES
LED Bulbs for Existing Fixtures
More LED’s for Existing Fixtures
OTHER OFF-GRID ARTICLES
POWER: DIY Portable Solar System
SHOWER: Off-Grid Pressurized Shower
Thank you for the post. We have been trying to figure this one out for a while. It looks like I will be making a trip to Ikea soon to get new lights!
Great! Good-luck and let me know if you have any questions!
-NICK
My florescent fixture just went out and I am considering alternative replacements. If the Ikea lamps are less than a inch thick, I can easily slip them into the old fixture. What are the exact dimensions? (Not mentioned in the Ikea docs.)
Peace and Light, Jim
Hey Jim!
The model of have is super slim – maybe 1/4″ thick and maybe 2-2.5″ in diameter.
Cheers!
-NICK
Actually, if you wire the LEDs backwards, they will not fry. They just won’t light up. LEDs are diodes, which only pass current in one direction. They will block it if it is in the other direction. The only way LEDs will fry is if they have too much voltage supplied to them. The voltage must be DC and within the current rating of the LED for it to work properly. Thanks for the article! I will use these some day.
Hey Bob! Before compiling this article I tried connecting them to see what happened…they fried (They flickered then several of them turned black and the light no longer works). I am FAR from an electrical savvy! Not sure what to make of that… Maybe it was the way they were wired to the board?
Thanks for the comment! With these specific IKEA lights I would recommend not wiring them backwards 😉
So did you keep the little 4 port junction box and wire after that, or cut that out as well?
Nope – I made sure I knew which wire was +/- then cut it off and soldered it to the trailers 12v DC wiring.
So you removed the wire at the fixture and soldered there? That seems fairly complicated. Is it possible to just crimp the wires? Sorry, I am an idiot when it comes to electrical stuff…
Yep, I just cut off the wire from the transformer box. This wire is pretty long and I left it long so I could get the light exactly where I needed it. With the excess I just coiled it & zip tied it out of the way. You could crimp the wires or use wire nuts and electrical tape. Soldering is more permanent. I would use wire nuts over the crimps… Curious what your installing the lights into?
BTW – LOVE you bike blog!
Nice write-up! How can you tell if the LED kit has a converter? I’d like to use these lights in my bus conversion but I’ll be running 24 VDC to my lights.
Do you have a material list and schematic of your solar system?
I’d like to run lines through before putting my walls up but the electrical is basically foreign to me right now.
Cheers!
Thanks!
The Ikea kit has a little box that states 120v AC input and 12v DC output. So instead of feeding it AC I just skipped the middle man and wired directly to the 12v.
I am no electrician but it seems for 24v you would need something to step it down to 12v…
Our solar setup right now is very minimal…we have one costco 12v battery, one 100w panel and a cheesy charge controller. The plan is to get at least (2) 6v batteries another 100w panel and a better charge controller. The panels will be kept portable and not permanently mounted to the trailer for better placement. Ill do an update when we’ve done more with solar.
Cheers!
-NICK
For the 24v bus conversion, if you use pairs of 2 x 12v lights, wired in series (a quick search of series wiring will tell you more than I can here) they will run 12v to each fixture.
Your 24v system is actually 2 12v batteries. All you do is run your leads off one battery and you got 12v.
I like the looks of these way better than the OEM pan lights I have! Are you wiring each light in independently? Four seems like more than I would need most places.
Hey Emi!
Yes we you can wire up as many as you need and since we didn’t use the junction box and transformer we put 4 over the kitchen, 3 over the dinette and 2 over out bed/couch.
Hopes this helps!
-NICK
Just purchased the dioder. Your post solved my delima about wiring direct to the 12 volt system on r v. Thanks for the info.
Awesome! Thanks for the note!
Awesome work! How would you rate this job in difficulty? How many hours did it take? Thanks!
It was pretty straight forward! It took me roughly 1hr per set of lights. Hope this helps!
Is it possible to use a dimmer switch when you do this conversion? Right now I have battery powered puck lights but want to put in permanent lights. I really like the feature of being able to have a bright and low setting of the battery lights. They use a remote that turns them all on and off with 2 settings. It’s nice to have all lights switch on when I come in at night and put on low for evening. I have a separate reading light and kitchen light. It’s a nice set up, but using 3 AAA batteries each is a waste.
I’m not sure…I haven’t tried it personally and it would be a handy feature! I would guess you could add a dimmer switch…anybody know the answer to this?
Since not all LEDs can be dimmed (to the best of my knowledge), I have set up and installed two sets of lights in the same area. When I want want dim, i turn on the 2-LED set. When i want medium, i turn on the 4-LED set. When i want brightest, i turn on both 2-LED and 4-LED (for 6 total) sets.
Voila. Three level lighting.
There are many other electronic devices that actually use 12v DC with an external or internal AC-DC converter. I have experimented with some garage sale purchases tested on an independent 12v car battery. Some with success. Some not so.
Just keep a fire extinguisher and first aid kit nearby. Do your testing outside away from flammable items. Make sure your life insurance policy is up to date.
It really will depend on the LED. The is a range of voltage within which the LED will function and depending on how they were manufactured will change their behavior at the minimum voltage. I haven’t played much with LED’s in a number of years, so it won’t hurt to try it, but don’t expect the same behavior you see with incandescent bulbs.
Wow. I have no idea what I just read but I feel good knowing that there is something I can do once I figure it out. Thanks!
Thanks so much for this info, I’ve been looking for something just like this for my travel trailer. Electrical is not my forte so I’ll be having my dad install these, but I was wondering if all 4 lights had to be turned on at the same time, or is it possible to just turn one or two on at a time? From the package, it looks like they’re all strung on the same wire, so I wasn’t sure if they each had independent on/off switches? Thanks again for the help!
Hey Linzie!
Yes stock they all plug into a box that is operated by one switch. For the hack we only used the lights. You could install switches to whatever combo of lights you want. We put only two of the lights over our bed which has its own switch.
Hope this helps!
-NICK
Hi Nick,
Got to know that you are powering LED lamps using 12VDC on your RV.
How long have you been using the lamps and do you face any problems?
I too plan to run some led strip lights using rechargeable battery but i am concerned with the flactuating voltage of the 12Vdc battery.
Is it going to be safe to run led lights on rechargeable battery?
Thanks,
Sun Boy
We’ve been using the LED’s for several years now without any problems. The batteries do a fine job lighting them up.
Yes, absolutely safe to run LED’s off your batteries!
Cheers!
-NICK
Hi Nick ,
I just want to ask if you came across any problems with the lamps that you run using rechargeable battery ?
I plan to run some LED strip lights using solar power but heard that due to voltage fluctuations, the lights won’t last long.
My thinking is that i’m only running the lights at night and charging the battery happens in the day.
So by night time, the battery voltages should have got stable and won’t pose any problems to the lights. Am i correct ?
Thanks,
John.
You shouldn’t have any issues powering your LED’s with a 12V battery! I haven’t heard of the voltage fluctuations…many people (myself included) run LED’s off the batteries without any issues.
Cheers!
-NICK